100 Days on Chunk Getting Started Guide
Survive your first days on a floating chunk—class, hunger, nights, and walls explained.
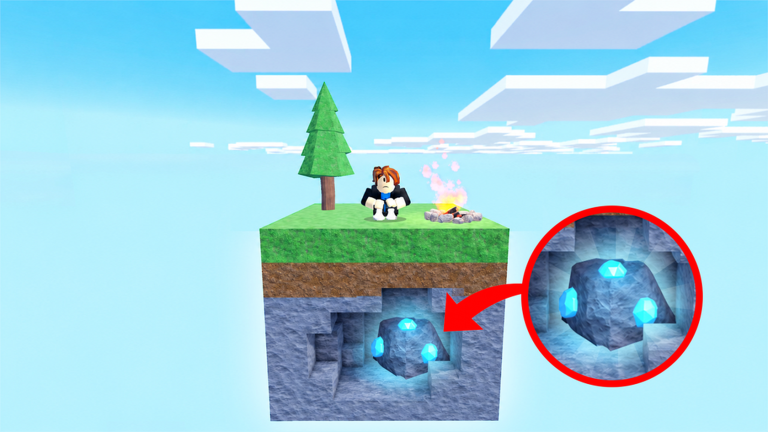
Welcome to the void
100 Days on Chunk drops you onto a lone floating platform with a simple promise: gather resources, craft new biome chunks, build a base, and live until Day 100. Nights freeze ambitious building, zombies pressure your walls, and later hunter raids plus bosses raise the stakes. This guide covers the lobby-to-first-week loop so you stop falling into the void before the real game begins.
When you finish here, continue with Survive 100 Days for the full early/mid/late route, and skim All Classes before spending Gems.
Step 1 — Lobby and class select
Join from the official Roblox page. In the lobby, open Classes before you press play:
- Explorer (free) — Wooden Sword, Pickaxe, and Axe. Best first choice.
- Paid Gem rows — Chef, Medic, Lumberjack, Ninja, Vampire.
- Engineer (399 Robux) — extra crossbow and cheaper crafting requirements.
New accounts should start on Explorer. If you already own Gems and early runs feel brutal, Chef or Medic at 75 Gems are gentle upgrades; see the class tier list before you impulsively buy Vampire.
Equip the class, then start the run. Server size caps at 15 players—public lobbies are lively but noisier; private servers help when you want a clean tutorial pace.
Step 2 — Read your first chunk
You spawn on a small floating island above endless void. Edges kill. Before you sprint:
- Note where the void drops are and walk them once so camera angles feel safe.
- Gather starter wood, stone, and food nodes on the platform.
- Open crafting as soon as you can place a campfire or cooking station—raw hunger drains while you sightseeing.
- Stash extras in a chest near the center so night chaos does not scatter loot toward the rim.
Your first goal is not Day 100. Your first goal is surviving Night 1 with cooked food and a crude wall.
Step 3 — Day versus night rules
Daytime is for gathering, crafting new chunks, expanding the footprint, and remodeling. Nighttime is for defense: building options lock down, so unfinished wall projects become zombie highways. Plan builds so that when the sky darkens you already have:
- A closed or nearly closed perimeter on the edges you expect spawns to pressure
- Torches or light where the game expects them
- Cooked food and bandages in hotbar slots
- A kite path that does not end in a void fall
If the sun is low and you are mid-expansion, stop placing decorative floors and finish the wall seam instead.
Step 4 — Hunger and early cooking
Hunger is a silent run killer. Cook early and often. Chef’s slower drain helps, but Explorer can manage with discipline:
- Prioritize a fire and a small cooked stack before long mining loops.
- Do not explore a freshly crafted biome chunk on an empty stomach.
- Keep a reserve in chests for nights when looting corpses is unsafe.
Medic’s bandages matter after fights; they do not replace food. Track both meters like fuel gauges.
Step 5 — Expand with biome chunks
The signature mechanic is crafting new chunks attached to your base—forest, quarry, desert, and other biomes as you unlock recipes. Expansion rules of thumb:
- Expand in daylight only.
- Attach new platforms where you can wall the seam the same day.
- Use early wood-heavy biomes to feed further crafts; Lumberjack accelerates this phase.
- Leave intentional gaps only if you understand kite routes; random Swiss-cheese floors cause void deaths.
More land means more nodes, but also more perimeter to defend. Grow only as fast as your walls and food can support.
Step 6 — Walls before ego projects
A pretty tower does nothing if zombies walk through an open edge. Early wall priorities:
- Seal spawn-facing sides first.
- Add height where melee enemies path onto your main pad.
- Keep a gated entrance you can defend without trapping yourself.
- Place storage inward so a breach does not yeet your Bones into the void.
Later you will place lightning rods and totems—never park rods in the middle of everything; they attract strikes. Details belong in Bosses and Raids.
Step 7 — First progression targets after Night 3
Once nights feel controllable:
- Start noticing bone piles and quarry loot for future boss chunks — How to Get Bones
- Scout toward desert content only when food and walls are stable — How to Get Artifact
- Bank Gems from badges, crates, and run payouts; codes are inactive as of October 2026 per the Codes Hub
Do not craft a boss chunk the moment the recipe appears if your walls cannot handle the aftermath.
Common beginner mistakes
- Buying Vampire before learning void camera control
- Expanding three chunks in one afternoon with zero walls
- Ignoring hunger while chasing shiny ore ESP screenshots
- Fighting on the rim instead of inside a walled pad
- Quitting after one night wipe instead of treating Day 1–5 as the tutorial arc
Next reading
- Survive 100 Days — full walkthrough
- Food and Hunger — cooking habits before long expansion days
- Chunk Types and Rarities — common / epic / legendary expansion goals
- Crafting and Buildings — walls, storage, lightning rods
- Classes Hub and All Classes
- Guides Hub — bones, artifacts, bosses, gems index
- Official Links — favorite the experience and join Freshly Cooked Games
Master the day/night split, keep eating, seal the edges, then expand on purpose. That is getting started on a chunk.
Frequently Asked Questions
Quick answers to the most common questions.
What class should beginners pick?
Explorer is free and enough to learn. If you have 75 Gems, Chef or Medic smooth early hunger or healing—see the class tier list.
Can I build at night?
Nights lock down building. Finish walls and major crafts in daylight, then defend after dark.
Why do I keep dying to the void?
Slow down near edges, expand with sealed seams, and kite inside walled floors instead of along the rim.
What should I read after this guide?
Continue with Survive 100 Days and start collecting Bones via How to Get Bones.